连接
编辑连接
编辑此页面包含连接和使用客户端与 Elasticsearch 所需的信息。
本页内容
身份验证
编辑本文档包含代码片段,向您展示如何连接到各种 Elasticsearch 提供商。
Elastic Cloud
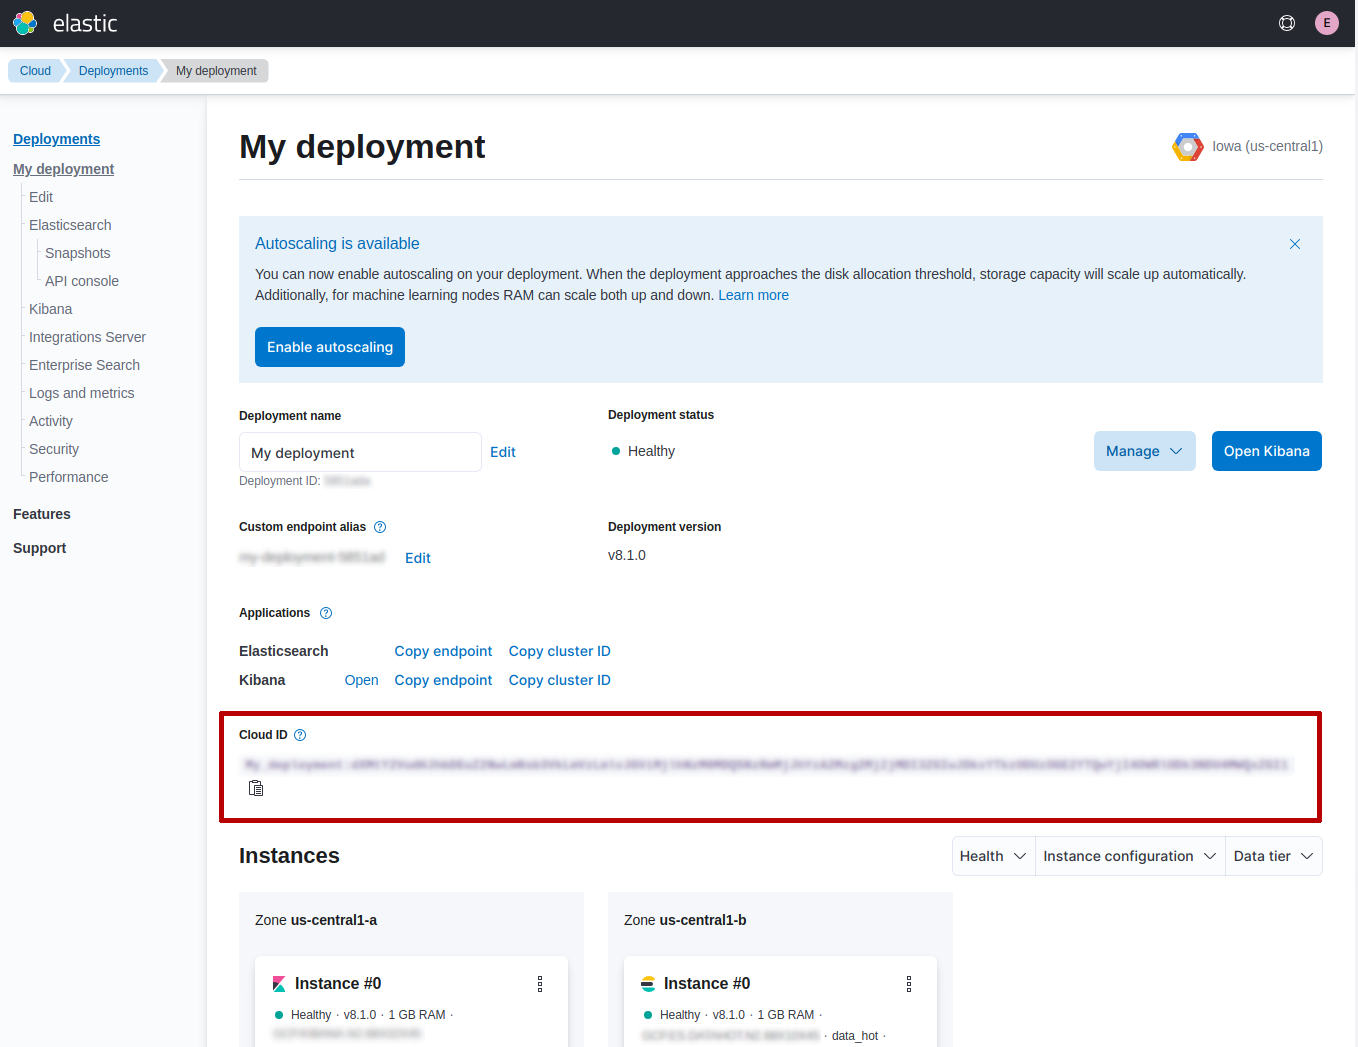
编辑如果您正在使用 Elastic Cloud,客户端提供了一种简单的方法来连接它。您需要云控制台中可以找到的 Cloud ID,然后是您的用户名和密码。

收集 Cloud ID 后,您可以按如下方式使用客户端连接到您的 Elastic Cloud 实例
require 'elasticsearch'

client = Elasticsearch::Client.new(
  cloud_id: '<CloudID>'
  user: '<Username>',
  password: '<Password>',
)
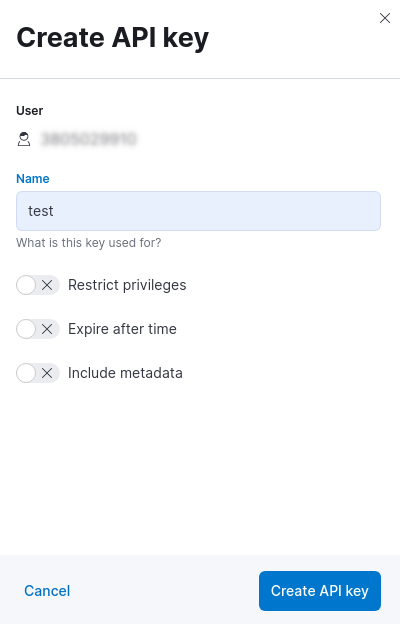
您还可以使用 API 密钥身份验证连接到云。您可以在 管理 页面的 安全 部分下生成一个 API 密钥。

当您单击 创建 API 密钥 时,您可以选择一个名称并设置其他选项(例如,限制权限,超时后过期等)。

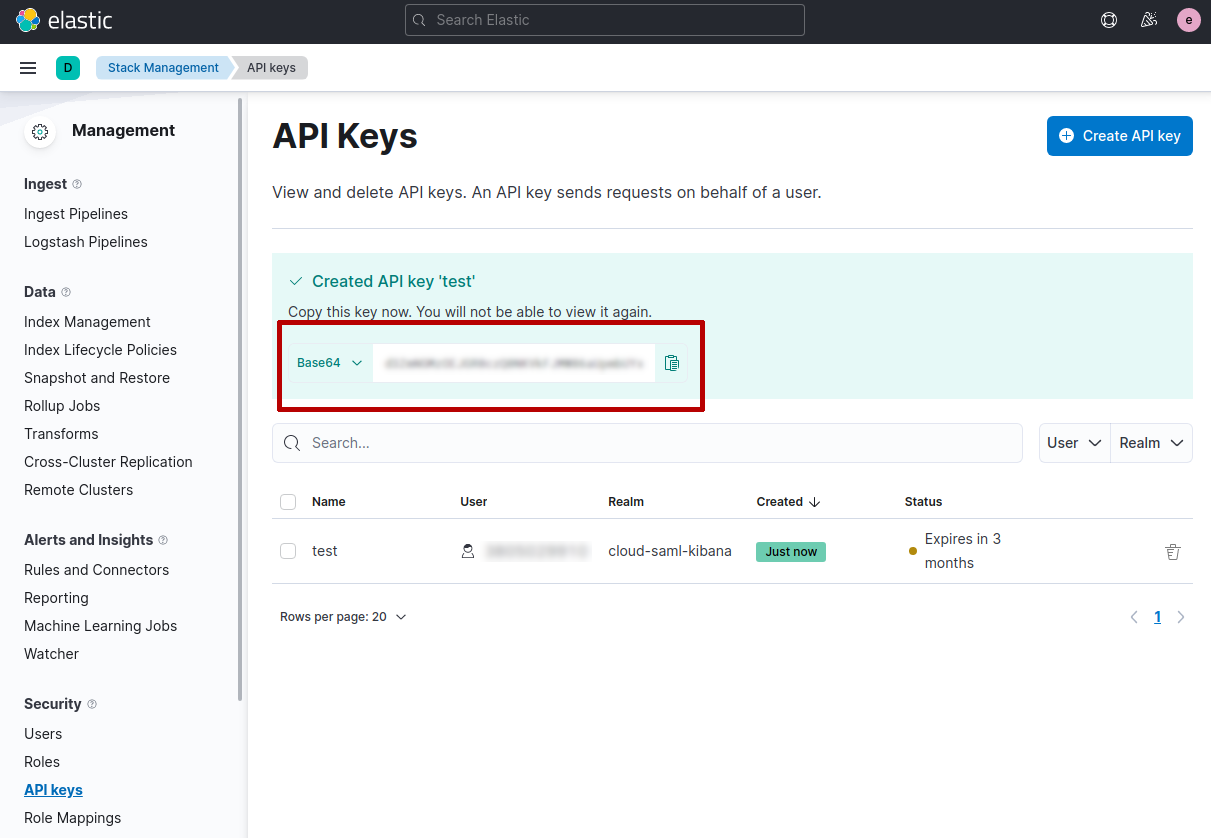
完成此步骤后,您将在 API 密钥页面中获取 API 密钥。

重要:您需要将 API 密钥 复制并存储在一个安全的位置,因为您将无法在 Elastic Cloud 中再次查看它。
收集 Cloud ID 和 API 密钥 后,您可以按如下方式使用客户端连接到您的 Elastic Cloud 实例
client = Elasticsearch::Client.new(
  cloud_id: '<CloudID>',
  api_key: '<ApiKey>'
)
如果您通过开发控制台或 REST API 创建 API 密钥,您可能会得到一对 id 和 APIKey 值。客户端也接受 api_key 参数的哈希值,因此您可以传入这些值,它会在内部编码 API 密钥
client = Elasticsearch::Client.new(
  cloud_id: '<CloudID>',
  api_key: {id: '<Id>', api_key: '<APIKey>'}
)
连接到自管理集群
编辑Elasticsearch 8.0 默认提供安全性,这意味着启用了身份验证和 TLS。
要连接到 Elasticsearch 集群,您需要配置 Ruby Elasticsearch 客户端以使用 HTTPS 和生成的 CA 证书,以便成功发出请求。
如果您刚开始使用 Elasticsearch,我们建议阅读有关配置和启动 Elasticsearch 的文档,以确保您的集群按预期运行。
当您第一次启动 Elasticsearch 时,您会在 Elasticsearch 的输出中看到一个如下所示的独特块(如果已经有一段时间了,您可能需要向上滚动)
----------------------------------------------------------------
-> Elasticsearch security features have been automatically configured!
-> Authentication is enabled and cluster connections are encrypted.

->  Password for the elastic user (reset with `bin/elasticsearch-reset-password -u elastic`):
  lhQpLELkjkrawaBoaz0Q

->  HTTP CA certificate SHA-256 fingerprint:
  a52dd93511e8c6045e21f16654b77c9ee0f34aea26d9f40320b531c474676228
...
----------------------------------------------------------------
记下 elastic 用户密码和 HTTP CA 指纹,以便在接下来的部分中使用。在下面的示例中,它们将分别存储在变量 ELASTIC_PASSWORD 和 CERT_FINGERPRINT 中。
根据具体情况,有两种方法可以验证 HTTPS 连接,一种是使用 CA 证书本身进行验证,另一种是通过 HTTP CA 证书指纹进行验证。
使用 CA 证书验证 HTTPS
编辑生成的根 CA 证书可以在您的 Elasticsearch 配置位置的 certs 目录中找到 ($ES_CONF_PATH/certs/http_ca.crt)。如果您在 Docker 中运行 Elasticsearch,则有检索 CA 证书的附加文档。
一旦您在某个可访问的地方拥有 http_ca.crt 文件,请通过 ca_certs 将路径传递给客户端
client = Elasticsearch::Client.new(
  host: "https://elastic:#{ELASTIC_PASSWORD}@localhost:9200",
  transport_options: { ssl: { ca_path: CERT_DIR } }
)
使用证书指纹验证 HTTPS
编辑这种验证 HTTPS 连接的方法利用了之前记下的证书指纹值。获取此 SHA256 指纹值,并通过 ca_fingerprint 将其传递给 Ruby Elasticsearch 客户端
# Colons and uppercase/lowercase don't matter when using
# the 'ca_fingerprint' parameter
CERT_FINGERPRINT = '64F2593F...'

# Password for the 'elastic' user generated by Elasticsearch
ELASTIC_PASSWORD = "<password>"

client = Elasticsearch::Client.new(
  host: "https://elastic:#{ELASTIC_PASSWORD}@localhost:9200",
  transport_options: { ssl: { verify: false } },
  ca_fingerprint: CERT_FINGERPRINT
)
验证将每个连接运行一次。
可以使用带证书文件的 openssl x509 计算证书指纹
openssl x509 -fingerprint -sha256 -noout -in /path/to/http_ca.crt
如果您无权访问 Elasticsearch 生成的 CA 文件,则可以使用以下脚本使用 openssl s_client 输出 Elasticsearch 实例的根 CA 指纹
# Replace the values of 'localhost' and '9200' to the
# corresponding host and port values for the cluster.
openssl s_client -connect localhost:9200 -servername localhost -showcerts </dev/null 2>/dev/null \
  | openssl x509 -fingerprint -sha256 -noout -in /dev/stdin
openssl x509 的输出将如下所示
SHA256 Fingerprint=A5:2D:D9:35:11:E8:C6:04:5E:21:F1:66:54:B7:7C:9E:E0:F3:4A:EA:26:D9:F4:03:20:B5:31:C4:74:67:62:28
API 密钥身份验证
编辑您还可以使用 ApiKey 身份验证。
如果您同时提供基本身份验证凭据和 ApiKey 配置,则 ApiKey 优先。
Elasticsearch::Client.new(
  host: host,
  transport_options: transport_options,
  api_key: credentials
)
其中 credentials 是 id 和 api_key 通过冒号连接的 base64 编码,或者是一个包含 id 和 api_key 的哈希值
Elasticsearch::Client.new(
  host: host,
  transport_options: transport_options,
  api_key: {id: 'my_id', api_key: 'my_api_key'}
)
基本身份验证
编辑您可以在主机配置哈希中传递身份验证凭据、方案和端口
client = Elasticsearch::Client.new(
  hosts:
	  [
  	   {
    	   host: 'my-protected-host',
    	   port: '443',
    	   user: 'USERNAME',
    	   password: 'PASSWORD',
    	   scheme: 'https'
  	   }
	  ]
)
或者使用常见的 URL 格式
client = Elasticsearch::Client.new(url: 'https://username:password@localhost:9200')
要将自定义证书传递给基于 Faraday 的客户端进行 SSL 对等验证,请使用 transport_options 选项
Elasticsearch::Client.new(
  url: 'https://username:password@localhost:9200',
  transport_options: {
	ssl: { ca_file: '/path/to/http_ca.crt' }
  }
)
用法
编辑以下代码片段显示了使用 Ruby 客户端的示例
require 'elasticsearch'

client = Elasticsearch::Client.new log: true

client.cluster.health

client.index(index: 'my-index', id: 1, body: { title: 'Test' })

client.indices.refresh(index: 'my-index')

client.search(index: 'my-index', body: { query: { match: { title: 'test' } } })
在函数即服务环境中使用客户端
编辑本节说明在函数即服务 (FaaS) 环境中利用 Elasticsearch 客户端的最佳实践。 最有影响的优化是在函数外部(全局范围)初始化客户端。这种做法不仅提高了性能,而且还实现了后台功能,例如嗅探。以下示例为最佳实践提供了一个框架。
GCP Cloud Functions
编辑require 'functions_framework'
require 'elasticsearch'
client = Elasticsearch::Client.new(
cloud_id: "elasic-cloud-id",
user: "elastic",
password: "password",
log: true
)
FunctionsFramework.http "hello_world" do |request|
client.search(
index: 'stack-overflow',
body: {
query: {
match: {
title: {
query: 'phone application'
}
}
}
}
)
end
AWS Lambda
编辑require 'elasticsearch'
def client
@client ||= Elasticsearch::Client.new(
cloud_id: "elastic-cloud-id",
user: "elastic",
password: "password",
log: true
)
end
def lambda_handler(event:, context:)
client.search(
index: 'stack-overflow',
body: {
query: {
match: {
title: {
query: 'phone application'
}
}
}
}
)
end
用于评估这些建议的资源
启用兼容模式
编辑Elasticsearch 服务器版本 8.0 引入了一种新的兼容模式,使您可以从 7 到 8 更平稳地升级。简而言之,您可以使用最新的 7.x Elasticsearch 客户端和 8.x Elasticsearch 服务器,从而为协调将您的代码库升级到下一个主要版本提供更多空间。
如果您想利用此功能,请确保您使用的是最新的 7.x 客户端,并将环境变量 ELASTIC_CLIENT_APIVERSIONING 设置为 true。客户端在内部处理其余部分。对于每个 8.0 及更高版本的客户端,您都已设置完毕!默认情况下启用兼容模式。