教程:设置跨集群复制
编辑教程:设置跨集群复制
编辑使用本指南在两个数据中心之间的集群中设置跨集群复制 (CCR)。跨数据中心复制数据有以下几个好处:
- 使数据更靠近用户或应用程序服务器,以减少延迟和响应时间
- 为您的关键任务应用程序提供容错能力,以承受数据中心或区域中断
在本指南中,您将学习如何:
- 配置一个带有主索引的远程集群
- 在本地集群上创建一个跟随者索引
- 创建一个自动跟随模式,以自动跟随在远程集群中定期创建的时间序列索引
您可以手动创建跟随者索引来复制远程集群上的特定索引,或配置自动跟随模式来复制滚动时间序列索引。
如果您想在云中的集群之间复制数据,您可以在 Elasticsearch Service 上配置远程集群。然后,您可以跨集群搜索并设置跨集群复制。
先决条件
编辑要完成本教程,您需要:
- 本地集群上的
manage集群权限。 - 两个集群上都包含跨集群复制的许可证。激活 30 天免费试用版。
- 远程集群上包含要复制的数据的索引。本教程使用示例电子商务订单数据集。加载示例数据。
- 在本地集群中,所有具有
master节点角色的节点还必须具有remote_cluster_client角色。本地集群还必须至少有一个节点同时具有数据角色和remote_cluster_client角色。用于协调复制的各个任务的规模取决于本地集群中具有remote_cluster_client角色的数据节点数量。
连接到远程集群
编辑要将远程集群(集群 A)上的索引复制到本地集群(集群 B),您需要将集群 A 配置为集群 B 上的远程集群。

要从 Kibana 中的 Stack Management 配置远程集群:
- 根据需要设置安全连接。
- 从侧边导航中选择远程集群。
- 指定 Elasticsearch 端点 URL,或者远程集群 (
ClusterA) 的 IP 地址或主机名,后跟传输端口(默认为9300)。例如,cluster.es.eastus2.staging.azure.foundit.no:9400或192.168.1.1:9300。
API 示例
您还可以使用 集群更新设置 API 来添加远程集群
resp = client.cluster.put_settings(
    persistent={
        "cluster": {
            "remote": {
                "leader": {
                    "seeds": [
                        "127.0.0.1:9300"
                    ]
                }
            }
        }
    },
)
print(resp)
response = client.cluster.put_settings(
  body: {
    persistent: {
      cluster: {
        remote: {
          leader: {
            seeds: [
              '127.0.0.1:9300'
            ]
          }
        }
      }
    }
  }
)
puts response
const response = await client.cluster.putSettings({
  persistent: {
    cluster: {
      remote: {
        leader: {
          seeds: ["127.0.0.1:9300"],
        },
      },
    },
  },
});
console.log(response);
PUT /_cluster/settings
{
  "persistent" : {
    "cluster" : {
      "remote" : {
        "leader" : {
          "seeds" : [
            "127.0.0.1:9300"
          ]
        }
      }
    }
  }
}
您可以验证本地集群是否已成功连接到远程集群。
resp = client.cluster.remote_info()
print(resp)
response = client.cluster.remote_info
puts response
const response = await client.cluster.remoteInfo();
console.log(response);
GET /_remote/info
API 响应表明本地集群已通过集群别名 leader 连接到远程集群。
配置跨集群复制的权限
编辑跨集群复制用户需要在远程集群和本地集群上具有不同的集群和索引权限。使用以下请求在本地集群和远程集群上创建单独的角色,然后创建具有所需角色的用户。
远程集群
编辑在包含主索引的远程集群上,跨集群复制角色需要 read_ccr 集群权限,以及主索引上的 monitor 和 read 权限。
如果请求是通过 API 密钥进行身份验证的,则 API 密钥需要在本地集群上具有上述权限,而不是在远程集群上。
如果请求是代表其他用户发出的,则进行身份验证的用户必须在远程集群上具有 run_as 权限。
以下请求在远程集群上创建 remote-replication 角色:
resp = client.security.put_role(
    name="remote-replication",
    cluster=[
        "read_ccr"
    ],
    indices=[
        {
            "names": [
                "leader-index-name"
            ],
            "privileges": [
                "monitor",
                "read"
            ]
        }
    ],
)
print(resp)
const response = await client.security.putRole({
  name: "remote-replication",
  cluster: ["read_ccr"],
  indices: [
    {
      names: ["leader-index-name"],
      privileges: ["monitor", "read"],
    },
  ],
});
console.log(response);
POST /_security/role/remote-replication
{
  "cluster": [
    "read_ccr"
  ],
  "indices": [
    {
      "names": [
        "leader-index-name"
      ],
      "privileges": [
        "monitor",
        "read"
      ]
    }
  ]
}
本地集群
编辑在包含跟随者索引的本地集群上,remote-replication 角色需要 manage_ccr 集群权限,以及跟随者索引上的 monitor、read、write 和 manage_follow_index 权限。
以下请求在本地集群上创建 remote-replication 角色:
resp = client.security.put_role(
    name="remote-replication",
    cluster=[
        "manage_ccr"
    ],
    indices=[
        {
            "names": [
                "follower-index-name"
            ],
            "privileges": [
                "monitor",
                "read",
                "write",
                "manage_follow_index"
            ]
        }
    ],
)
print(resp)
const response = await client.security.putRole({
  name: "remote-replication",
  cluster: ["manage_ccr"],
  indices: [
    {
      names: ["follower-index-name"],
      privileges: ["monitor", "read", "write", "manage_follow_index"],
    },
  ],
});
console.log(response);
POST /_security/role/remote-replication
{
  "cluster": [
    "manage_ccr"
  ],
  "indices": [
    {
      "names": [
        "follower-index-name"
      ],
      "privileges": [
        "monitor",
        "read",
        "write",
        "manage_follow_index"
      ]
    }
  ]
}
在每个集群上创建 remote-replication 角色后,使用 创建或更新用户 API 在本地集群上创建一个用户,并分配 remote-replication 角色。例如,以下请求将 remote-replication 角色分配给名为 cross-cluster-user 的用户
resp = client.security.put_user(
    username="cross-cluster-user",
    password="l0ng-r4nd0m-p@ssw0rd",
    roles=[
        "remote-replication"
    ],
)
print(resp)
const response = await client.security.putUser({
  username: "cross-cluster-user",
  password: "l0ng-r4nd0m-p@ssw0rd",
  roles: ["remote-replication"],
});
console.log(response);
POST /_security/user/cross-cluster-user
{
  "password" : "l0ng-r4nd0m-p@ssw0rd",
  "roles" : [ "remote-replication" ]
}
您只需要在本地集群上创建此用户。
创建跟随者索引以复制特定索引
编辑当您创建跟随者索引时,您将引用远程集群和远程集群中的主索引。
要从 Kibana 中的 Stack Management 创建跟随者索引:
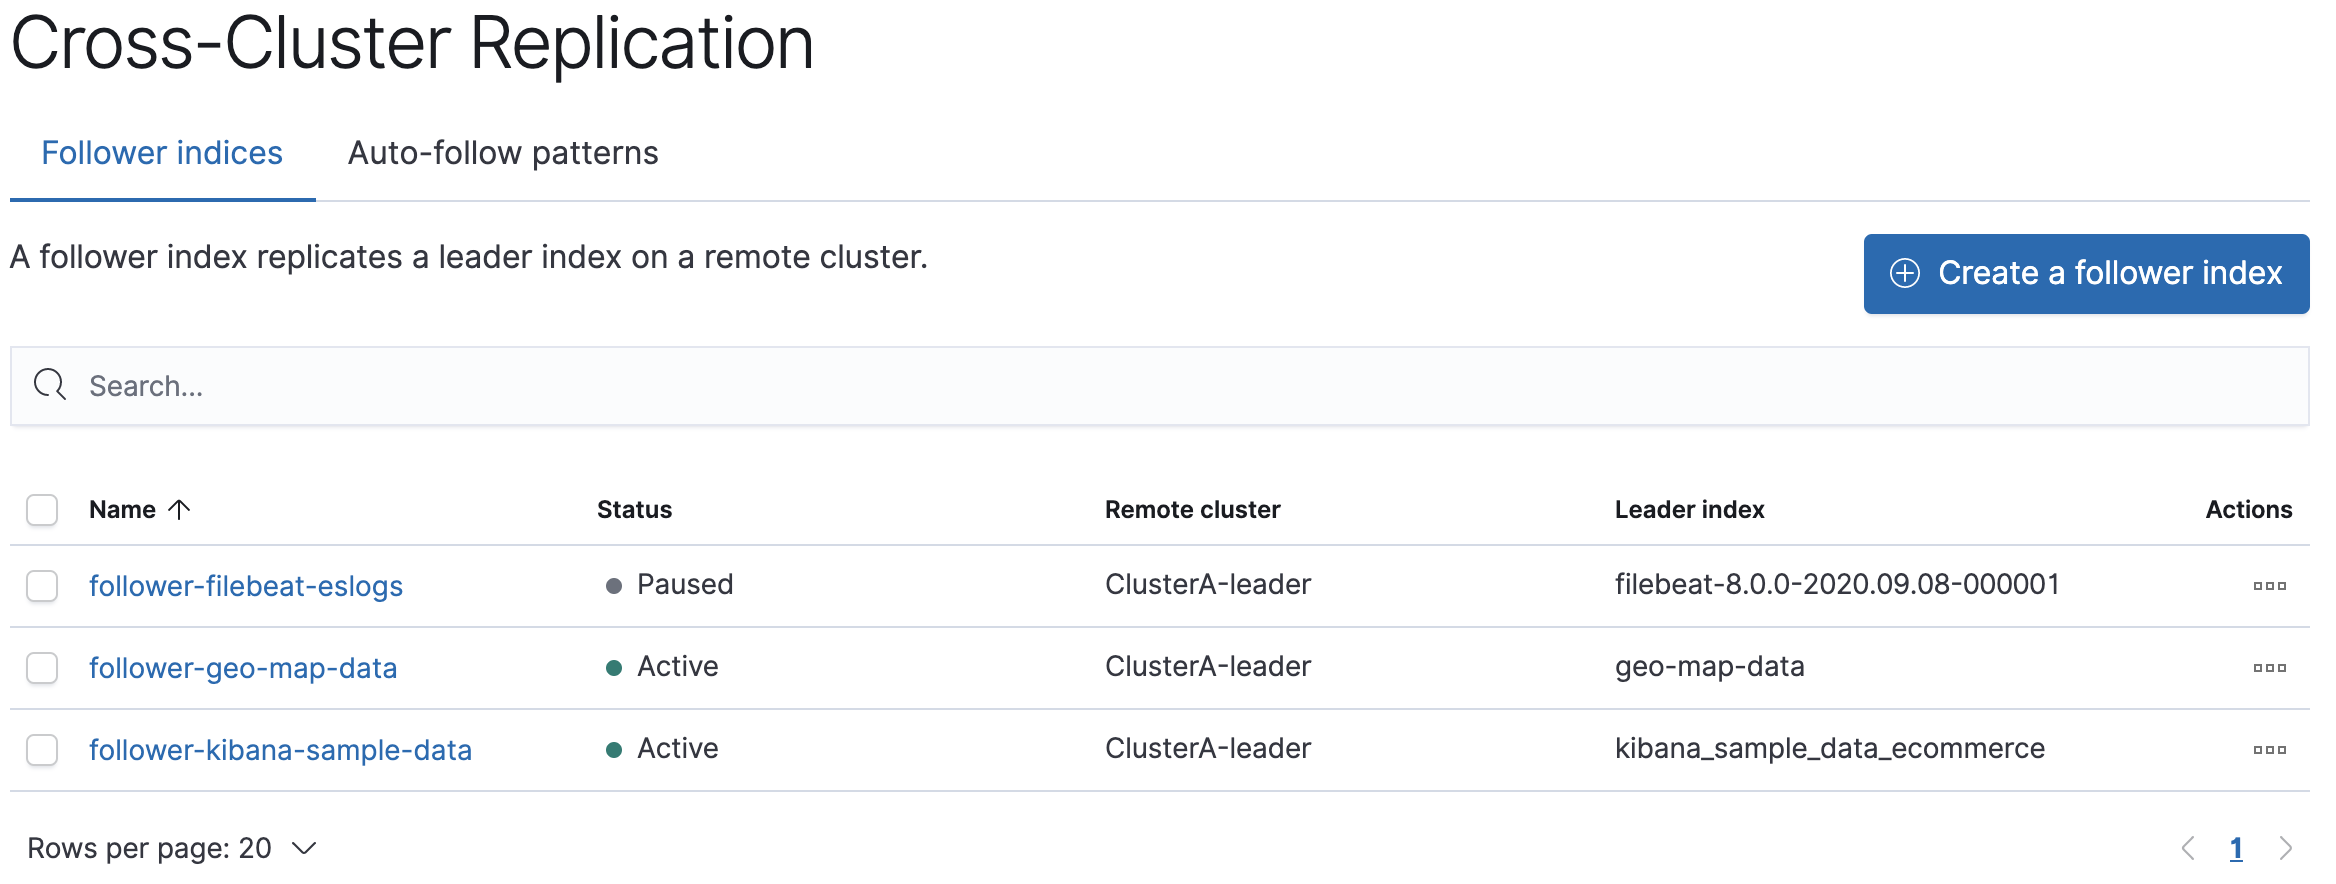
- 在侧边导航中选择跨集群复制,然后选择跟随者索引选项卡。
- 选择包含要复制的主索引的集群 (ClusterA)。
- 输入主索引的名称,如果您正在按照本教程进行操作,则该名称为
kibana_sample_data_ecommerce。 - 输入您的跟随者索引的名称,例如
follower-kibana-sample-data。
Elasticsearch 使用远程恢复过程初始化跟随者,该过程将现有 Lucene 段文件从主索引传输到跟随者索引。索引状态更改为 已暂停。远程恢复过程完成后,索引跟随开始,状态更改为 活动。
当您将文档索引到主索引中时,Elasticsearch 会将文档复制到跟随者索引中。

API 示例
您还可以使用创建跟随者 API 来创建跟随者索引。当您创建跟随者索引时,您必须引用远程集群和您在远程集群中创建的主索引。
在启动跟随者请求时,响应会在远程恢复过程完成之前返回。要等待该过程完成,请将 wait_for_active_shards 参数添加到您的请求中。
resp = client.ccr.follow(
    index="server-metrics-follower",
    wait_for_active_shards="1",
    remote_cluster="leader",
    leader_index="server-metrics",
)
print(resp)
const response = await client.ccr.follow({
  index: "server-metrics-follower",
  wait_for_active_shards: 1,
  remote_cluster: "leader",
  leader_index: "server-metrics",
});
console.log(response);
PUT /server-metrics-follower/_ccr/follow?wait_for_active_shards=1
{
  "remote_cluster" : "leader",
  "leader_index" : "server-metrics"
}
使用 获取跟随者统计 API 来检查复制状态。
创建自动跟随模式以复制时间序列索引
编辑您可以使用自动跟随模式来自动为滚动时间序列索引创建新的跟随者。每当远程集群上的新索引的名称与自动跟随模式匹配时,就会将相应的跟随者索引添加到本地集群。请注意,只有在创建自动跟随模式之后在远程集群上创建的索引才会被自动跟随:即使远程集群上现有的索引与模式匹配,也会被忽略。
自动跟随模式指定您要从中复制的远程集群,以及一个或多个索引模式,这些模式指定您要复制的滚动时间序列索引。
要从 Kibana 中的 Stack Management 创建自动跟随模式:
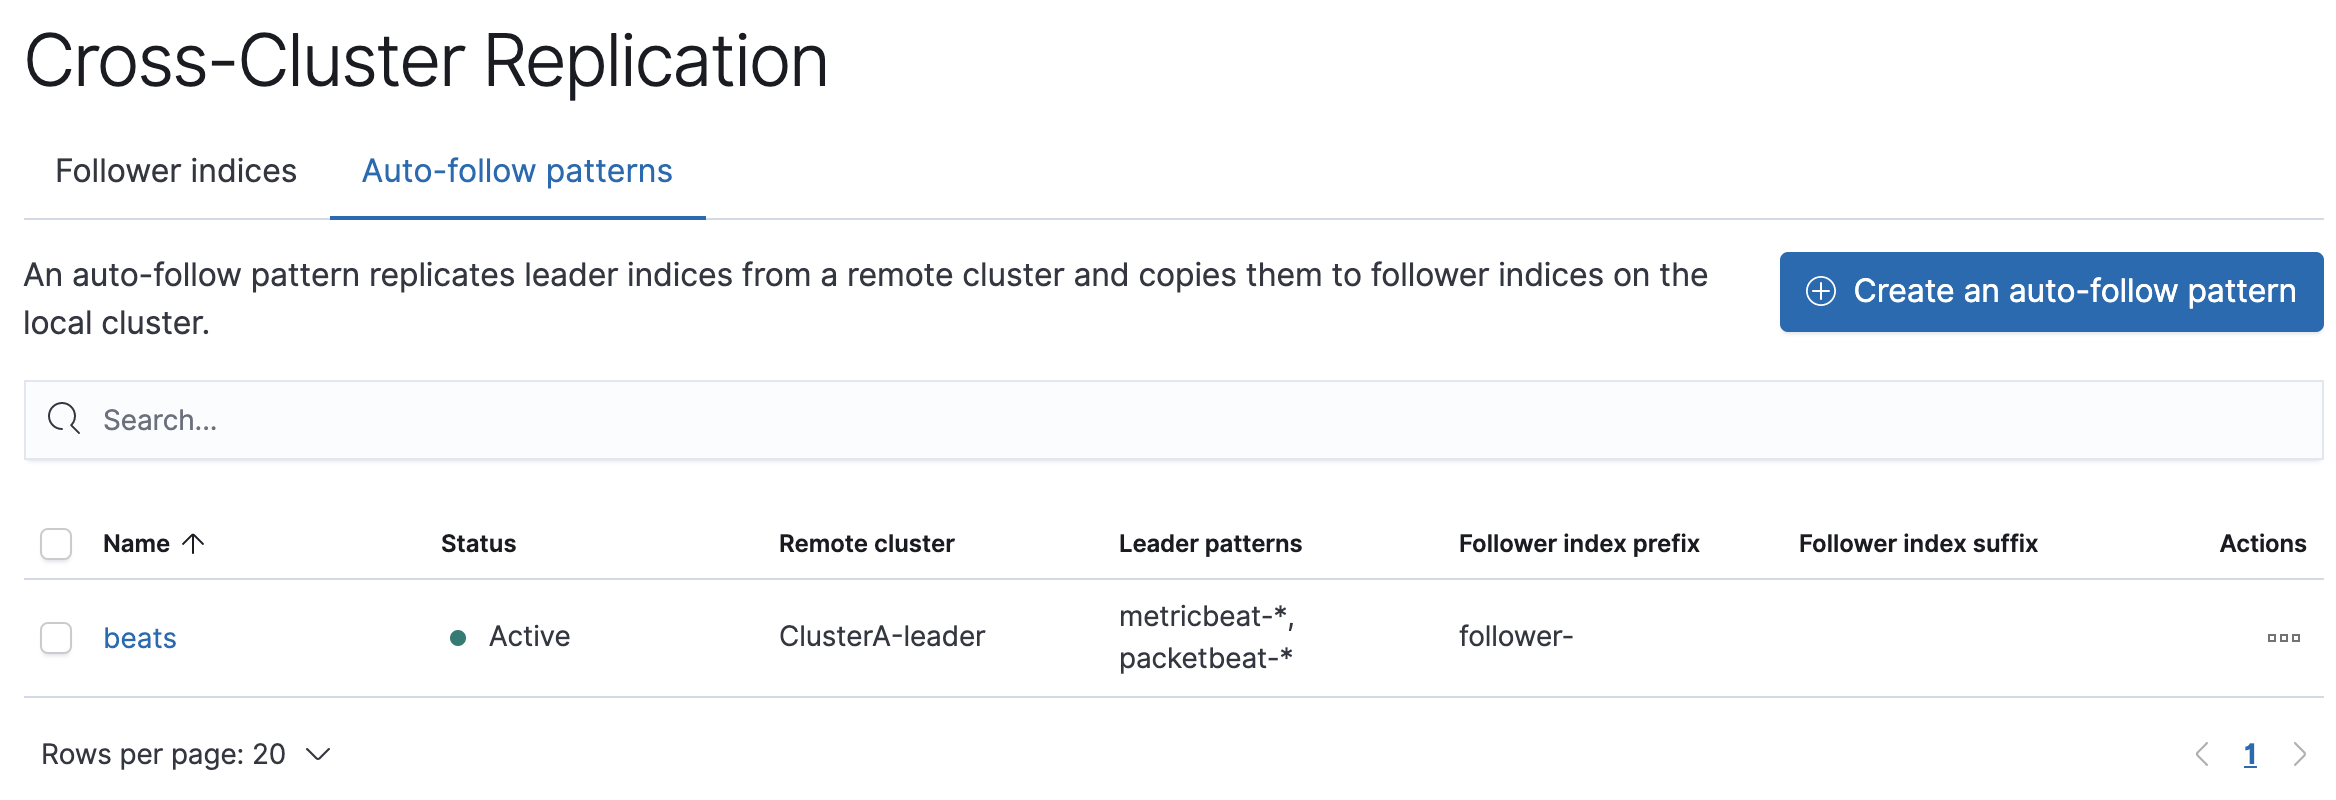
- 在侧边导航中选择跨集群复制,然后选择自动跟随模式选项卡。
- 输入自动跟随模式的名称,例如
beats。 - 选择包含要复制的索引的远程集群,在示例场景中,该集群为集群 A。
- 输入一个或多个索引模式,以标识您要从远程集群复制的索引。例如,输入
metricbeat-* packetbeat-*以自动为 Metricbeat 和 Packetbeat 索引创建跟随者。 - 输入 follower- 作为要应用于跟随者索引名称的前缀,以便您更容易识别复制的索引。
当在远程上创建与这些模式匹配的新索引时,Elasticsearch 会自动将它们复制到本地跟随者索引。

API 示例
使用 创建自动跟随模式 API 来配置自动跟随模式。
resp = client.ccr.put_auto_follow_pattern(
    name="beats",
    remote_cluster="leader",
    leader_index_patterns=[
        "metricbeat-*",
        "packetbeat-*"
    ],
    follow_index_pattern="{{leader_index}}-copy",
)
print(resp)
const response = await client.ccr.putAutoFollowPattern({
  name: "beats",
  remote_cluster: "leader",
  leader_index_patterns: ["metricbeat-*", "packetbeat-*"],
  follow_index_pattern: "{{leader_index}}-copy",
});
console.log(response);